How to Polish Cement Floor: A Step-by-Step Guide to Achieving a Smooth, Durable Finish
Polished cement floors have gained popularity in residential and commercial settings due to their sleek appearance, low maintenance, and long-lasting performance. Whether renovating your home, setting up a retail space, or preparing an industrial facility, learning how to polish a cement floor can save time and money and ensure a beautiful finish.
This guide will walk you through everything you need to know about the polishing process—tools, techniques, tips, and aftercare—to achieve professional-grade results.
How to polish a cement floor?
Cement floors that are adequately polished provide:
- A smooth, reflective surface
- Resistance to stains, chemicals, and wear
- Cost-effective maintenance over time
- A modern and industrial-chic aesthetic
Unlike traditional flooring materials, polished cement doesn’t require waxing or frequent resealing, making it a popular choice for high-traffic areas.
Tools and Materials You'll Need
Before getting started, make sure you have the following:
- Concrete grinder and polisher
- Diamond grinding pads (various grits)
- Dust extractor or vacuum
- Densifier (a chemical hardener)
- Floor buffer or burnisher
- Protective gear (goggles, gloves, dust mask)
- Water for wet polishing (if applicable)
Step 1: Prepare the Floor Surface
Start by thoroughly cleaning the surface. Remove any existing coatings, adhesive residues, or paint. You can use a floor stripper or solvent for stubborn layers.
Inspect the floor for cracks or holes. Repair any visible damage using a concrete patching compound and let it cure fully.
Tip: If working in an older building, ensure the floor is structurally sound and level before polishing.
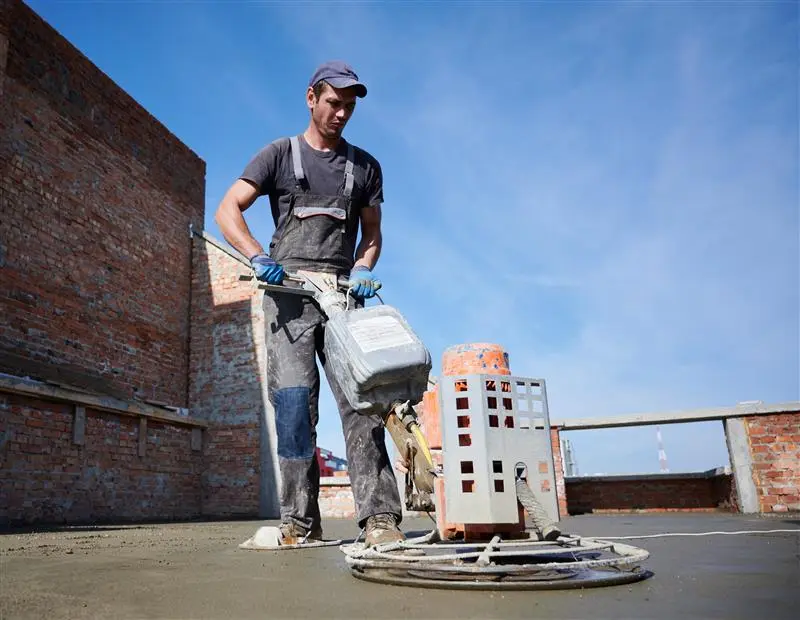
Step 2: Begin Grinding
Attach a coarse diamond grit pad (around 30–40 grit) to your concrete grinder. This step removes surface imperfections and opens up the pores of the concrete.
Work slowly and methodically, overlapping your passes to ensure even grinding. If you’re polishing indoors, use a dust extractor to minimize airborne particles.
Once the first grind is complete, progress through finer grits—usually from 80 to 150 to 400 grit—until the surface becomes smoother and more refined.
Step 3: Apply Densifier
Apply a densifier once the mid-range grinding (around 200 grit) is completed. This chemical solution penetrates the concrete surface and reacts with free lime to harden the floor, making it more durable and receptive to high-gloss polishing.
Let the densifier sit and cure per the manufacturer’s instructions—usually 1 to 2 hours.
Step 4: Final Polishing
Switch to finer diamond pads—800, 1500, or even 3000 grit—for the final polishing phase. It is where the real shine appears. Each pass should increase the reflectivity and smoothness of the surface.
Depending on your equipment and preference, you can polish either wet or dry. Wet polishing reduces dust and can provide a slightly glossier finish, but it’s messier and requires cleanup.
Step 5: Burnishing
Use a high-speed burnisher with a polishing pad for extra gloss and surface strength. Some professionals also apply a polishing guard or sealer to enhance the finish and protect the floor from stains.
Maintenance and Aftercare
Polished cement floors are low-maintenance, but they do require some upkeep to retain their finish:
- Daily: Dry mop with a microfiber pad to remove dust and debris.
- Weekly: Wet mop with a pH-neutral cleaner.
- Annually: Re-polish high-traffic areas if wear begins to dull the surface.
Avoid acidic or abrasive cleaners that can damage the polished surface.
When to Call a Professional
While DIY cement polishing is achievable with the right tools and patience, professionals best handle complex projects, such as those involving large areas or structural issues. It ensures safety, consistency, and a high-quality finish.
Understanding Your Options
Polished cement floors can be customized with stains, dyes, or decorative cuts to create unique, stylish finishes. They pair well with minimalist designs, open-concept layouts, and modern industrial aesthetics.
Depending on your project, consider integrating colored finishes or adding exposed Aggregate Concrete to the cement before polishing for a terrazzo-style look.
Why Premix Concrete SA Stands Out
For anyone looking to get started with polished cement floors, the quality of the concrete mix itself plays a critical role. That’s where Premix Concrete SA comes in.
Premix Concrete are a supplier only, but they excel in delivering the highest-quality premixed concrete to suit all kinds of applications. All their mixes are designed according to Australian Standards, using advanced mixing techniques and carefully sourced materials. The result? Consistent, reliable concrete that performs well under all conditions.
Though the final finish depends on the quality of the installer, Premix’s precision in mix design sets the foundation for beautiful, durable cement floors.”Our commitment to providing the best service makes us one of the most trusted ready-mix concrete suppliers in Adelaide.
Final Thoughts
Polishing a cement floor isn’t just about getting a shiny surface—it’s about enhancing the material’s natural strength, extending its lifespan, and achieving a finish that looks great and performs even better. Whether managing a home renovation or a commercial upgrade, understanding the polishing process can help you make informed decisions at every step.