site.developer
Trends in Commercial Concrete Design: From Polished Floors to Textured Aggregates
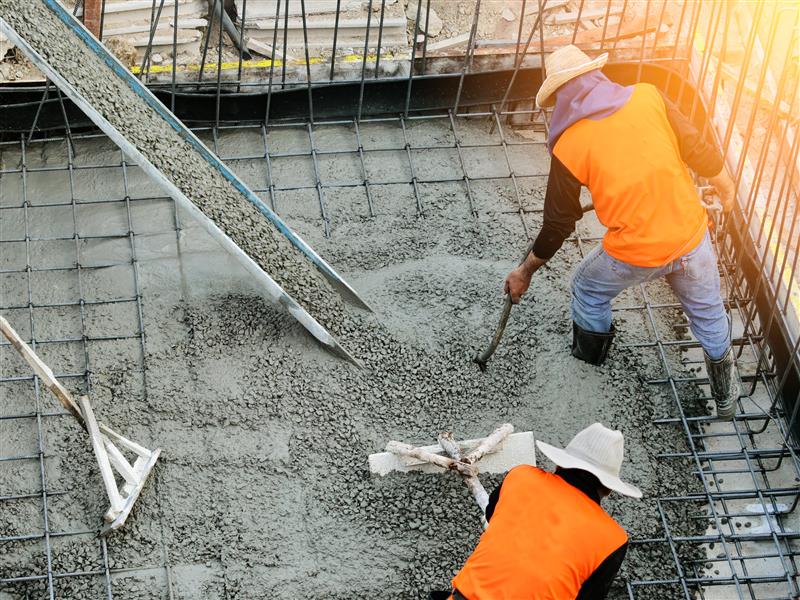
By 2025, concrete has evolved from being merely the ground beneath our feet to becoming a focal point. Commercial spaces in Australia and around the world are adopting decorative concrete because of its ability to create elegant, design-forward spaces in addition to its practical strength.
Aesthetics, performance, and long-term durability are driving the evolution of concrete in commercial design, from polished surfaces to exposed aggregate concrete finishes. Here are some of the most notable developments in commercial concrete design, along with the reasons they are changing our perception of this historically practical material.
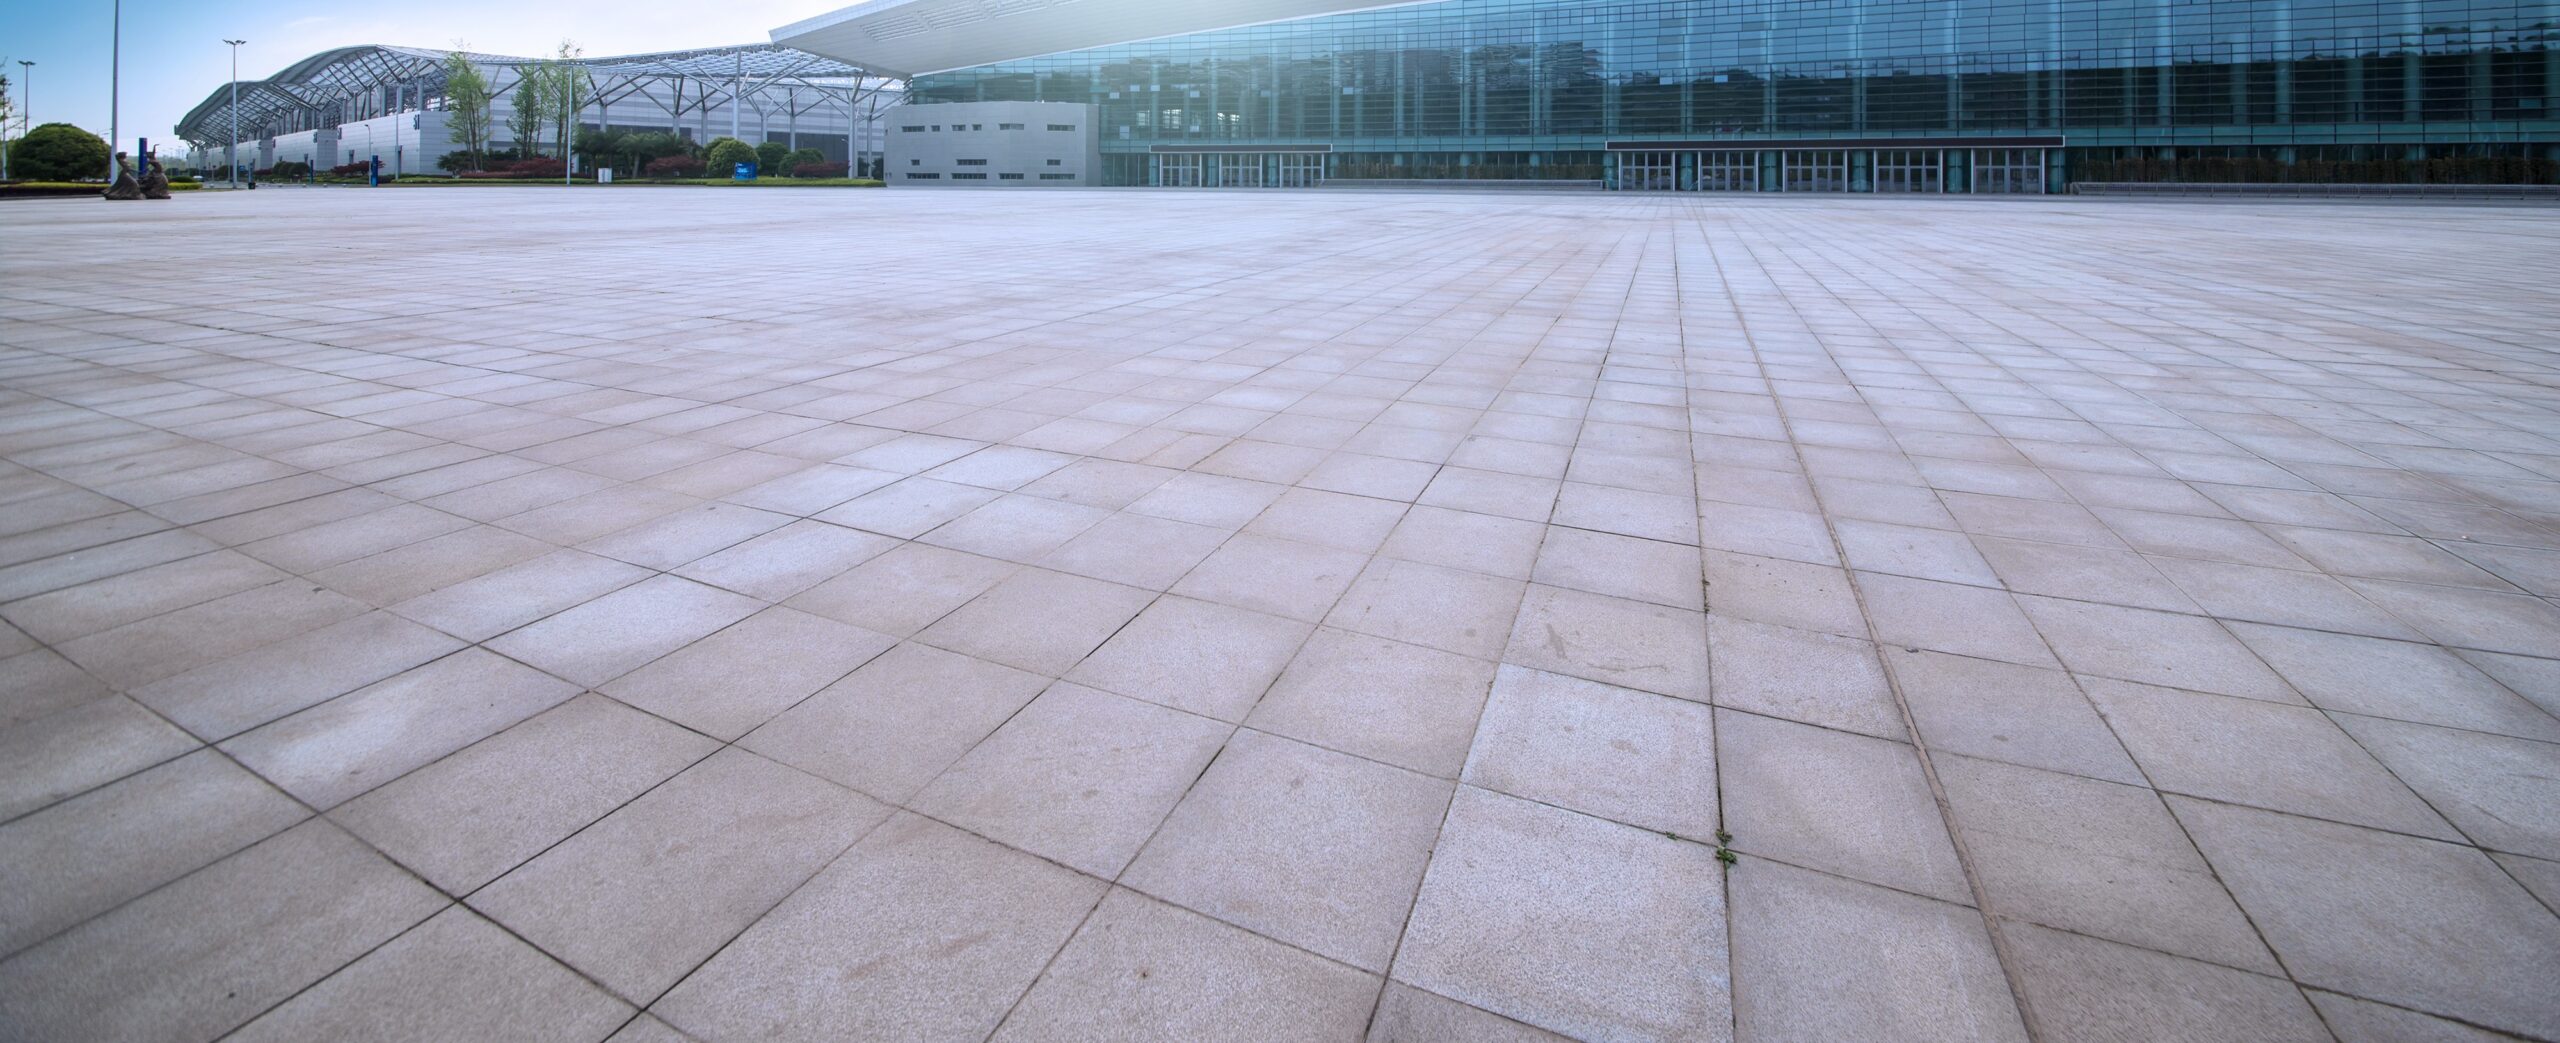
1. Polished Concrete: The Minimalist’s Dream
For commercial interiors, polished concrete is still a popular option. Its polished, mirror-like finish provides a polished look that works well in a variety of business settings, such as cafes, offices, and showrooms.
The popularity of polished concrete can be attributed to several practical benefits:
- Durability: Capable of withstanding heavy foot traffic.
- Maintenance ease: Less maintenance is needed than with conventional floor coverings.
- Sustainability: Makes use of the pre-existing concrete slab and does away with the need for extra floor materials.
Because of their environmentally beneficial qualities, polished finishes are becoming more popular in commercial construction, where sustainability is a major concern. Without the use of artificial overlays, polishing a floor also brings out the natural aggregates and tones in the concrete, giving each floor a distinctive appearance.
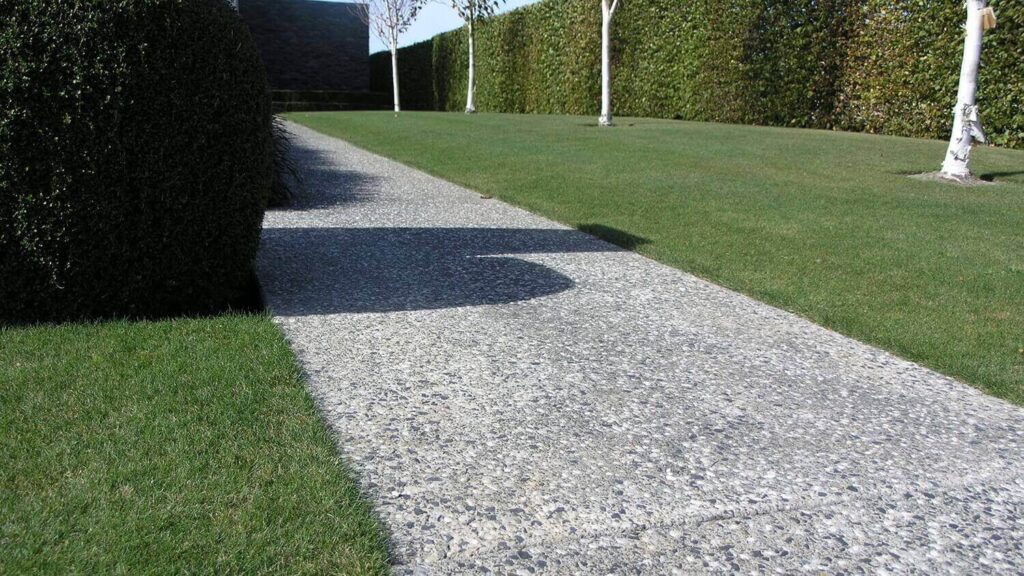
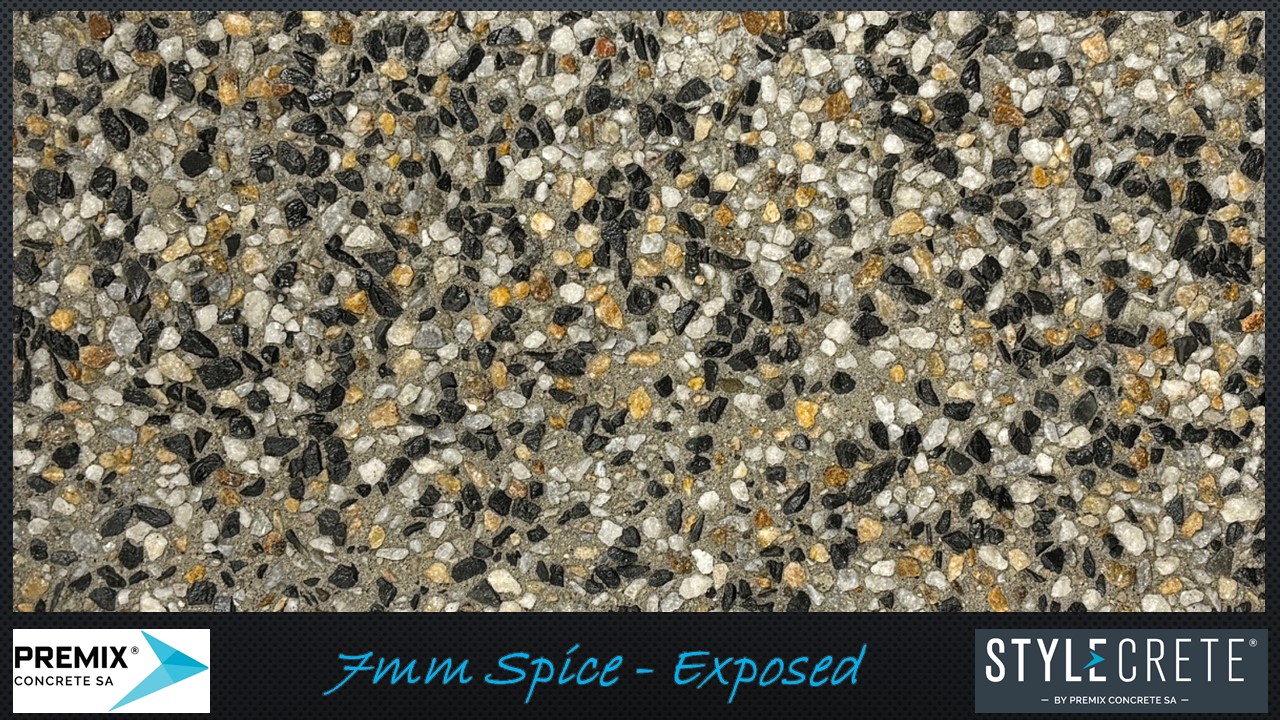
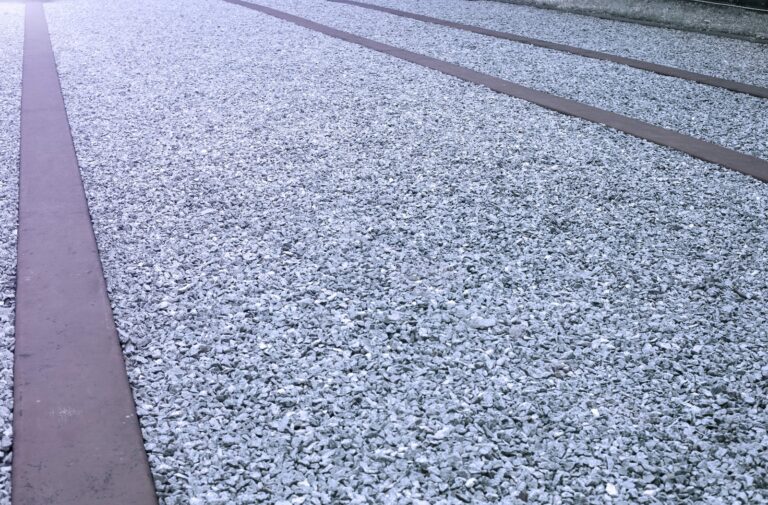
2. Exposed Aggregate Concrete: Textural Appeal for Outdoor and Transitional Spaces
Using exposed aggregate concrete is another trend that is rapidly expanding, particularly in transitional areas like courtyards, entrances, parking lots, and walkways for pedestrians.
Both form and function are provided by exposed aggregate:
- Slip resistance is essential for ensuring safety.
- Visual texture, giving it a luxurious, organic stone-like look.
- A range of coloured options for exposed aggregate concrete to blend in with the surrounding architecture.
To expose the underlying stones, pebbles, or decorative aggregates, the top layer of concrete paste is removed. Because its textured surface stays cooler underfoot than tiles or asphalt, this finish performs especially well in Australian spring and summer weather.
3. Decorative Coloured Concrete: Branding Through Design
Colour is more than just an aesthetic decision in commercial settings; it’s an integral component of the brand experience. For this reason, decorative coloured concrete is being used more imaginatively in corporate and retail settings.
Coloured concrete, which comes in a variety of shades and finishes, enables:
- Zoning in commercial open-plan layouts.
- Visual aids for safety pathways or walkways.
- Smooth incorporation of architectural or landscaping features.
Designers are increasingly using coloured concrete solutions to bring space and identity together, whether it’s through bold colours for retail branding or soft earth tones for a naturalistic setting.
Advancements in pigments and sealers have made coloured concrete more UV-resistant and longer-lasting; especially important in Australian climates where sun exposure is intense during spring and summer.
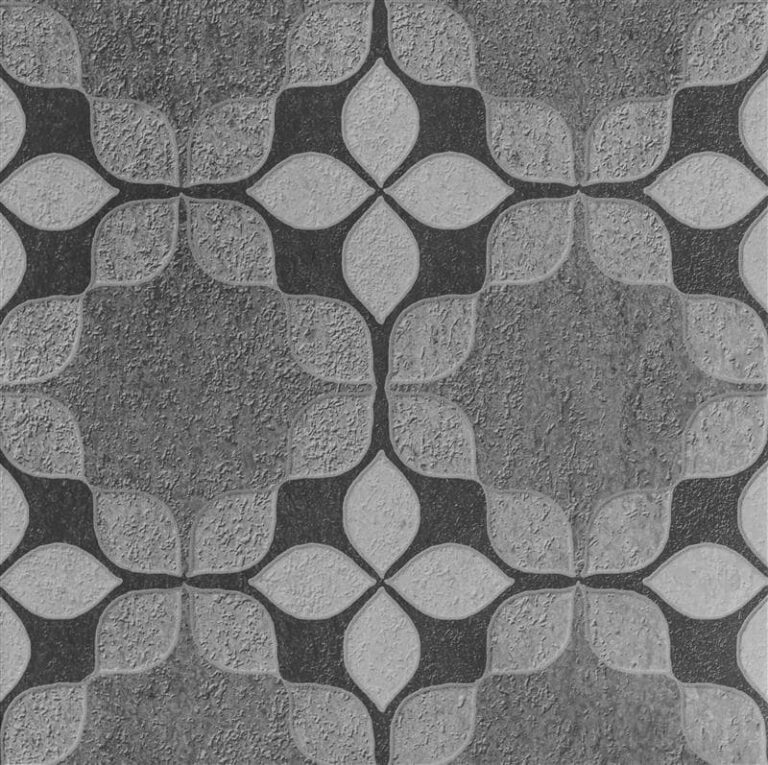
4. Designer Concrete Surfaces: Custom Patterns and Imprints
Additionally, there is a growing need for designer concrete solutions, particularly for projects that want to have a visual impact. These surfaces mimic other materials like brick, slate, or wood by incorporating textures, patterns, and even imprints, going beyond conventional finishes.
Methods like:
- Concrete that has been stamped to mimic natural paving.
- Patterns cut with a saw (for clean geometric lines).
- Overlays of coloured concrete (to update existing surfaces).
These days, mixed-use developments, retail establishments, and hospitality all make extensive use of them. Implementing these customised solutions is ideal during the spring, which is a popular season for outdoor improvements and commercial renovations.
5. Steel Fibre Reinforced Concrete: Strength Meets Style
Steel fibre reinforced concrete is becoming more popular for projects that need both high strength and a beautiful finish, such as commercial loading zones, warehouses with visible floors, or high-impact entranceways.
It offers:
- Improved resistance to cracking and tensile strength.
- Longer joint-free spans allow for cleaner, continuous surfaces.
- Compatibility with ornamental finishes such as coloured or polished concrete.
This type of concrete enables both structural performance and aesthetic appeal, so designers are no longer forced to choose between the two. Commercial sites that must simultaneously meet utility and customer-facing presentation requirements will find it especially helpful.
6. The Shift Toward Low-Gloss Sealers and Matte Finishes
Modern commercial interiors used to be characterised by high-gloss concrete, but in 2025, matte and low-sheen finishes are becoming more popular. These softer coatings:
- Cut down on glare in areas that receive plenty of sunlight.
- Provide a more organic, natural appearance.
- Are simpler to maintain in areas with lots of traffic.
This trend is in line with the larger trend in commercial design towards earthy, biophilic spaces, which use natural textures and materials to enhance the well-being of their occupants.
7. Seamless Indoor-Outdoor Transitions
The smooth transition from indoor polished surfaces to outdoor decorative concrete driveways, patios, or paths is increasingly important in design, especially in Australia during the spring. Companies want all areas to have a consistent aesthetic; consider hospitality spaces where the interior of the café blends into a textured courtyard with ornate concrete accents.
To maintain a consistent colour scheme, exposed aggregate concrete finishes or sealed coloured surfaces are commonly used outdoors and paired with burnished or polished finishes indoors.
8. Concrete as a Canvas for Light and Space
Lastly, concrete is being acknowledged by commercial designers as a medium for experimenting with spatial perception and light reflection. While textured or darker concrete tones give depth and intimacy to larger open spaces, polished surfaces reflect light, brightening interior spaces.
Concrete can be used creatively to turn plain flooring into a feature element by using light-colored aggregates, LED lighting integrated into grooves, or selectively polished areas. This way, concrete becomes more than just a component of the construction; it becomes a part of the brand experience.
Conclusion
Concrete has solidified its position as a foundational material and a design tool in commercial construction, from ornamental driveways to designer interiors. Durability, adaptability, and changing aesthetic choices – like textured aggregates, steel fibre reinforced finishes, and coloured concrete – continue to influence how areas appear and work.
These concrete design trends give businesses a long-lasting, economical, and imaginative way to leave a lasting impression on their customers’ feet and in their minds as they revamp their spaces this spring.
Concrete Myths Busted: Why Fancy Concrete is More Durable Than You Think

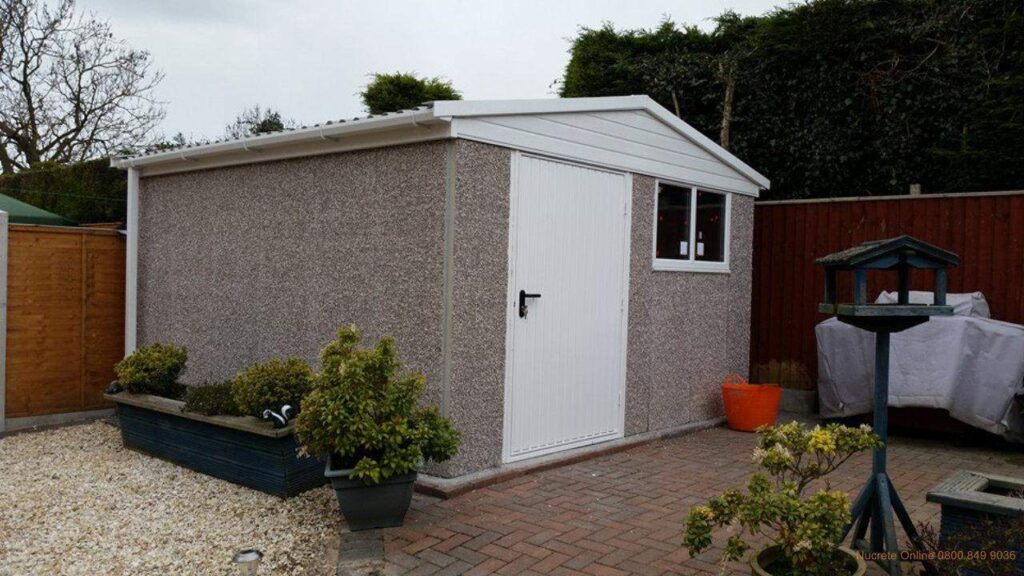
Concrete’s strength, adaptability, and dependability have long been praised. However, many people believe that ‘fancy concrete’ or ‘decorative concrete’ is less durable than its conventional grey counterpart. This myth has persisted for many years, frequently causing homeowners and even some experts to undervalue the longevity of exposed aggregate finishes, coloured concrete, and other designer concrete options.
Time to correct the record.
Myth 1: Decorative Concrete is Only About Aesthetics
Perhaps the most common misunderstanding is that decorative concrete is simply about looks. While it’s true that coloured concrete and designer finishes offer striking visual appeal, the notion that they compromise strength is far from accurate. Decorative concrete solutions are crafted with the same base materials as standard ready-mix concrete. In fact, many of these mixes exceed standard strength requirements, especially when reinforced with additives like steel fibres or high-grade aggregates. The result? A product that is both beautiful and built to last. Exposed aggregate concrete, for instance, not only adds texture and visual depth but also increases slip resistance, making it ideal for driveways, patios, and pool surrounds.
Myth 2: Coloured Concrete Fades Quickly and Becomes Patchy
The fact that coloured concrete ages poorly is another common worry. It’s a common misconception that ornamental surfaces will eventually become patchy, fade unevenly, or lose their colour. Modern concrete pigments are actually very resilient and made to withstand UV deterioration. Coloured concrete can keep its appearance for decades if it is properly mixed and sealed. Like any surface material, longevity depends on regular maintenance and high-quality application. Regular resealing can significantly prolong the surface’s life and colour, particularly in high-traffic areas. Furthermore, the colour penetrates the entire slab because it is frequently mixed into the concrete. This indicates that the underlying material keeps its colour even as the surface ages.
Myth 3: Fancy Finishes Mean Weak Structure
Phrases like “fancy concrete” can give the wrong impression, leading people to believe that the material is ornamental or fragile. Though finishes like polished, honed, or seeded concrete go through a rigorous processing that can actually increase their durability. For instance, honing entails grinding the concrete’s surface to expose aggregates and produce a dense, smooth finish. In addition to improving its aesthetic appeal, this compacts the surface, increasing its resistance to weathering and wear. The carefully selected decorative stones that are added to seeded aggregate concrete can actually increase the hardness of the surface. These treatments are essential to the mix’s functionality rather than being a cosmetic afterthought.
Myth 4: Decorative Concrete is Not Suitable for High-Traffic Areas
It is outdated to assume that decorative concrete is too fragile for applications such as walkways, driveways, or commercial spaces. Decorative concrete driveway with proper specification and installation can readily support the weight of cars and continuous foot traffic. Using the right concrete mix design, curing procedures, and reinforcement techniques is crucial. Decorative slabs can perform on par with or even better than plain grey concrete if the right reinforcement is used, such as steel fibre reinforced concrete or mesh. Furthermore, exposed aggregate concrete is frequently chosen for public areas due to its low-slip surface and longevity, making it a practical and attractive option.
Myth 5: Maintenance is Too Complex
Many people think that decorative finishes need a lot of maintenance. The idea that these surfaces require a lot of upkeep is exaggerated, even though it is true that maintaining aesthetic appeal requires some attention. Whether they are plain or ornamental, all concrete surfaces benefit from periodic cleaning and sealing. Decorative driveways and coloured concrete solutions need the same level of care. Sealing lowers surface wear, guards against moisture intrusion, and helps avoid stains. Resealing every few years is adequate for the majority of residential applications. Surfaces made of decorative concrete can last for decades if properly cared for.
The Truth: Fancy Concrete is Both Strong and Stylish
At its core, decorative concrete blends artistic freedom with structural integrity. It’s a material that unwaveringly meets both practical requirements and aesthetic goals. Its added value through design and versatility, rather than its lack of strength, is what makes it unique. While exposed or seeded aggregates improve traction and aesthetic appeal, finishes like polished or honed surfaces provide durability and smoothness. These choices are intentional improvements incorporated into the mix and finish rather than being merely add-ons. It is better to think of decorative concrete as an evolution of traditional concrete, designed to satisfy contemporary design standards while preserving the material’s well-known strength, rather than as a weaker substitute.
Tips for Ensuring Durability in Decorative Concrete
To maximise the lifespan of any decorative surface, consider the following:
- Employ premium materials: Select vendors who adhere to Australian regulations and are known for producing consistently high-quality goods.
- Ascertain correct installation: Collaborate with skilled contractors who are aware of the needs for decorative mixes.
- Seal the surface: To preserve appearance and protection, spend money on high-quality sealers and reapply as necessary.
- Use the appropriate concrete thickness and reinforcement for your particular application, particularly for driveways or commercial use, and account for load and traffic.
- Maintain surfaces regularly by cleaning them and checking them for wear or damage once a year.
Final Thoughts
Concrete has advanced significantly from the boring grey slabs of the past. Thanks to developments in mix designs, finishing methods, and materials, decorative concrete is now a premium option for both form and function. It’s time to reconsider presumptions and recognise the underlying resilience. Decorative options demonstrate that strength and style can indeed coexist since they are designed to function in the real world rather than just for show.
Why Functional Aesthetics Are the Future of Construction
Strength is no longer the only criterion used to evaluate the materials we use in the rapidly changing fields of architecture and construction. Modern construction requires functionality and aesthetics to work seamlessly together. Particularly in design-conscious markets like Australia, this new emphasis, known as functional aesthetics, has taken centre stage in contemporary construction. Long-lasting, environmentally friendly, and aesthetically pleasing building materials are becoming more popular for everything from residential streetscapes to expansive urban developments. Decorative concrete has emerged as the leading choice, offering a balance of strength, versatility, and design appeal.
1. Redefining Concrete: From Utility to Design Statement
Concrete has traditionally been valued for its resilience and structural reliability. Recent developments, however, have changed its function from that of a basic material to that of an essential element in architectural expression. For example, coloured exposed aggregate concrete adds to the overall design of outdoor spaces while providing a textured and polished finish that resists weather.
In a similar vein, decorative coloured concrete is used to enhance architectural palettes and give public walkways, driveways, and business areas personality. This advanced decorative mix, known as Stylecrete, provides designers with multiple creative options while ensuring lasting structural integrity.
These developments change the way developers, architects, and urban planners view the built environment by demonstrating that concrete can now support both performance and design goals.
2. Practical Benefits of Decorative Concrete Solutions
Decorative concrete has several practical benefits beyond appearances.
- Durability: Materials with increased tensile strength, such as steel fibre reinforced concrete, are perfect for high-traffic areas like commercial floors and driveways.
- Low Maintenance: Decorative concrete surfaces that have been sealed are resistant to weathering, staining, and cracking, which lowers the need for continuous maintenance.
- Slip Resistance: Because exposed aggregate concrete and other finishes offer natural traction, they can be used for poolside areas and pedestrian walkways.
- Versatility: Decorative concrete can be used for both horizontal and vertical surfaces, such as patios and retaining walls, enabling design coherence throughout entire complexes.
- More residential, civic, and commercial construction projects are incorporating decorative concrete surfaces because of this unique combination of functionality and style.
3. Meeting Design Goals Without Compromise
A key difficulty in construction lies in achieving harmony between design appeal and practical performance. Even if a structure satisfies technical requirements, its real estate value and user satisfaction may suffer if it is not aesthetically pleasing. This gap is filled by decorative concrete solutions.
Coloured concrete solutions can be tailored to match modern architectural lines or harmonise with the surrounding landscape.
Integrating decorative concrete into courtyards, common areas, and walkways in mixed-use developments guarantees design coherence while providing long-term functionality. This makes it simpler for planners and builders to satisfy aesthetic and engineering requirements in a single product line.
4. Adaptability for Australian Conditions
Building materials that can withstand harsh conditions, such as intense UV exposure and heavy rainfall, are necessary due to Australia’s diverse climate. These settings have shown decorative concrete to be a good fit.
For instance, exposed aggregate concrete finish maintains a textured, non-slip surface while facilitating effective water drainage, making it perfect for both urban and coastal applications. Options for coloured concrete are designed to not fade in direct sunlight, guaranteeing that surfaces will look good for a long time.
Additionally, regional blends that meet Australian standards are provided by nearby concrete producers and readymix concrete suppliers, providing professionals with assurance regarding their suitability for South Australian conditions.
5. The Broader Impact: Streetscapes and Urban Identity
Modern cities’ identities are being shaped by functional aesthetics, which is more than a trend. The use of decorative concrete has increased because of urban planners’ emphasis on pedestrian-friendly spaces and aesthetically harmonious neighbourhoods.
Decorative concrete driveways and pathways contribute to the creation of a unified aesthetic that improves liveability and visual coherence in a variety of settings, including residential developments, civic squares, and laneways. Stylecrete concrete and other materials can be finished to blend in with the surroundings or to stand out as architectural elements on their own.
This reflects a broader recognition that the materials we use influence how people experience and interact with space daily, in addition to their functionality.
Conclusion
The future of construction is embodied by functional aesthetics, where materials are chosen for their design, sustainability, and user experience in addition to their strength. At the forefront of this development is decorative concrete, which combines form and function.
Concrete has evolved from a construction necessity to a key design tool, whether through coloured surfaces, exposed aggregate textures, or reinforced structural mixes. The next generation of built environments will continue to be defined by materials that combine durability and design value, such as decorative concrete, as the demand for more deliberate, aesthetically pleasing spaces increases throughout Australia.
Top 10 Outdoor Areas That Shine with StyleCrete Concrete
When it comes to creating unforgettable outdoor spaces, few materials match the versatility, durability, and aesthetic appeal of decorative concrete. Innovative solutions like StyleCrete are transforming how designers and homeowners view concrete. From bold driveways to serene pool surrounds, these decorative concrete turns ordinary surfaces into standout features. Whether you’re building a new home or refreshing your backyard, here are ten outdoor spaces that truly come to life with the beauty of decorative concrete.
1. Driveways That Impress
People frequently see your driveway first, so StyleCrete is your first opportunity to stand out. For a driveway that improves exterior appeal and lasts over time, choose from exposed aggregate, colored concrete, or even patterned finishes.
Why It Shines:
- The excellent durability for vehicle usage
- Personalized finishes that complement your house’s design
- Weather-resistant and minimal upkeep
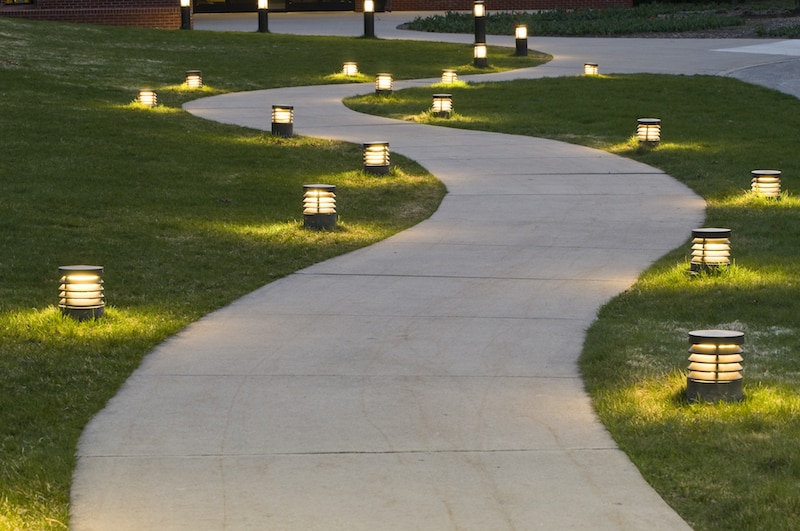
2. Style-Driven Pathways
Garden walkways and paths don’t have to be boring. With StyleCrete, you can create textured, flowing pathways that elegantly and charmingly welcome visitors to your outdoor area.
Design Tip: For striking nighttime appeal, combine lighting with colored or seeded concrete walkways.
3. Patios That Are Ideal for Gathering
Any backyard may become the center of attention with a well-designed patio. StyleCrete finishes offer a welcoming environment for outdoor furniture, cookouts, and get-togethers with loved ones.
Why It Works:
- Slip-resistant surfaces
- Resistant to stains and high foot traffic
- Available in colors that complement organic components
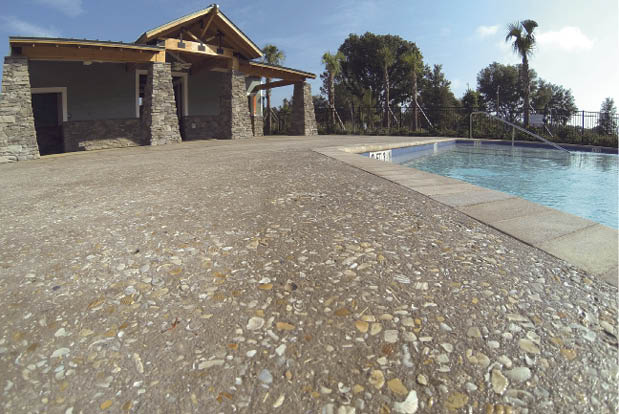
4. Pool Environments That Are Secure and Advanced
The textured finishes from StyleCrete are perfect for areas around pools as they are both aesthetically pleasing and safe. To make damp areas safe and fashionable, use exposed aggregate or slip-resistant seeded concrete.
Bonus: StyleCrete is suitable for barefooting because it won’t heat up as much in the sun as tiles.
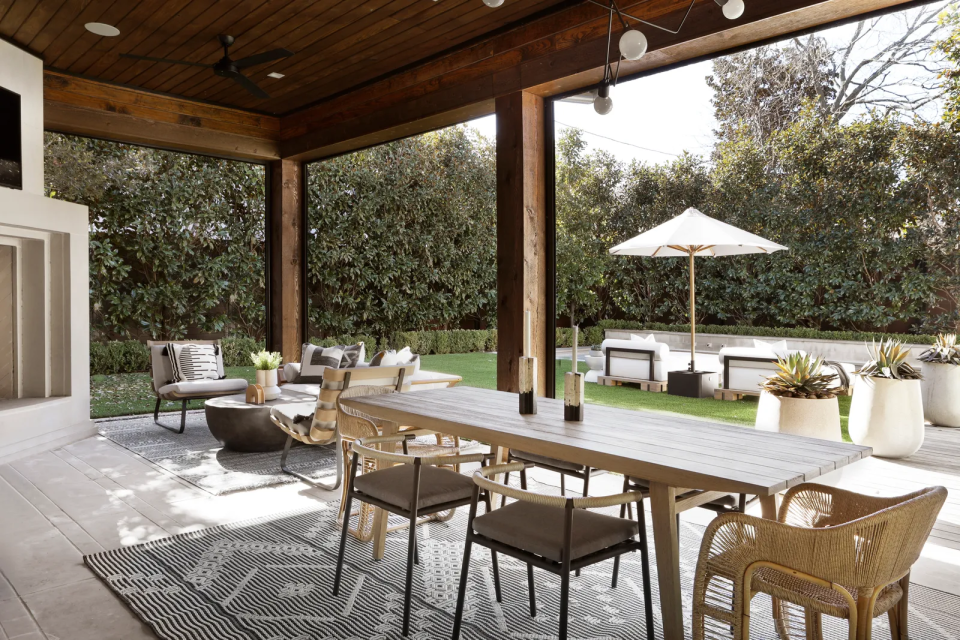
5. Outdoor Dining Areas
StyleCrete provides surfaces for outdoor kitchens and dining spaces that are both beautiful and incredibly functional. Low-maintenance concrete that is resistant to weather, spills, and stains is advantageous in these areas.
Entertainer’s Tip: To distinguish the eating area from the garden or grass, use colored concrete.
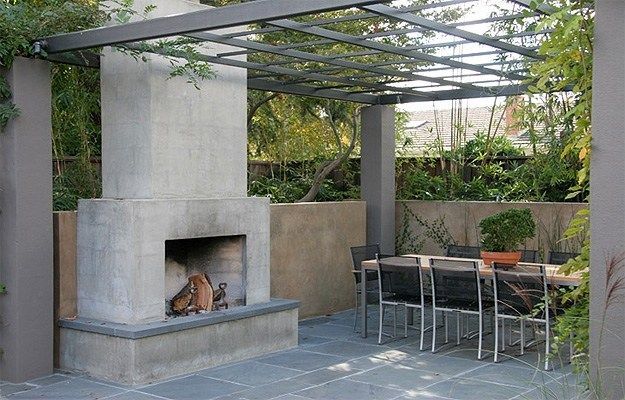
6. Vertical Elements and Feature Walls
Think beyond the ground. Beautiful vertical concrete elements like planter walls, seating walls, and even modern outdoor fireplaces may be made with StyleCrete.
Why It Is Unique:
- Adds personality to the architecture
- Blends in perfectly with horizontal surfaces
- Very little maintenance is needed.
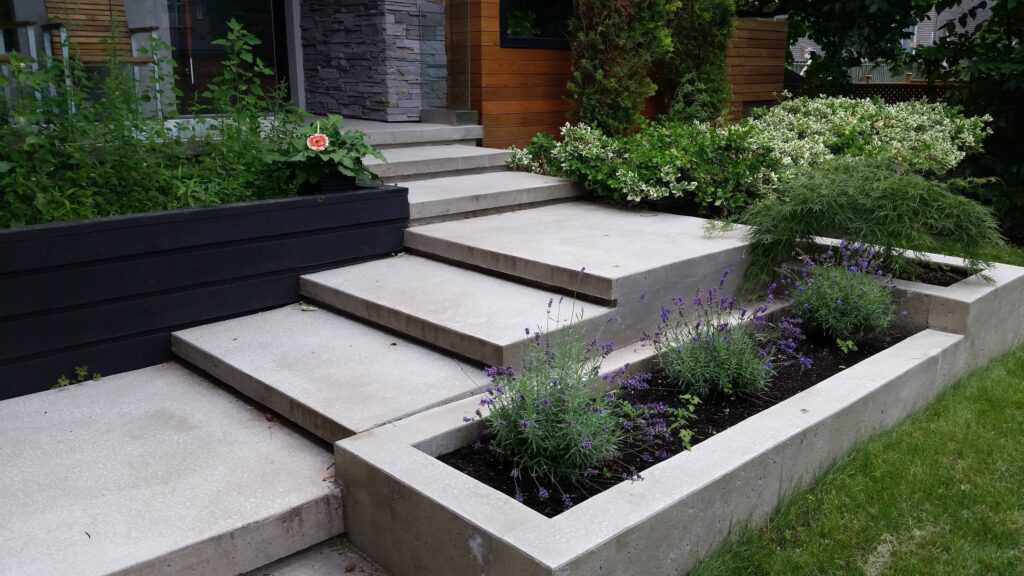
7. Front Entrance Steps
The atmosphere of your entire house is created by your front stairs. This essential component can be transformed into a true design element with textured StyleCrete treatments.
Style Tip: For unified curb appeal, match your steps to your driveway or pathway.
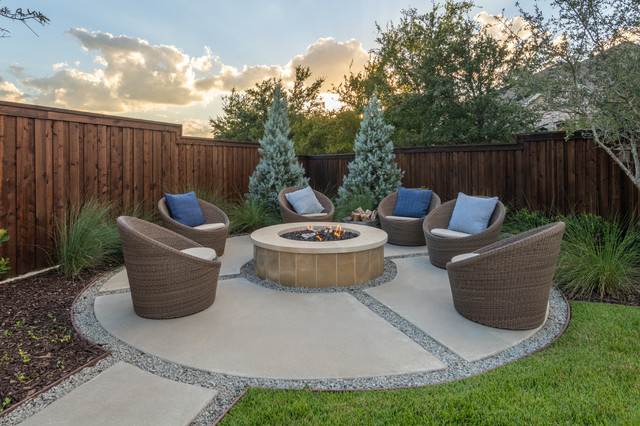
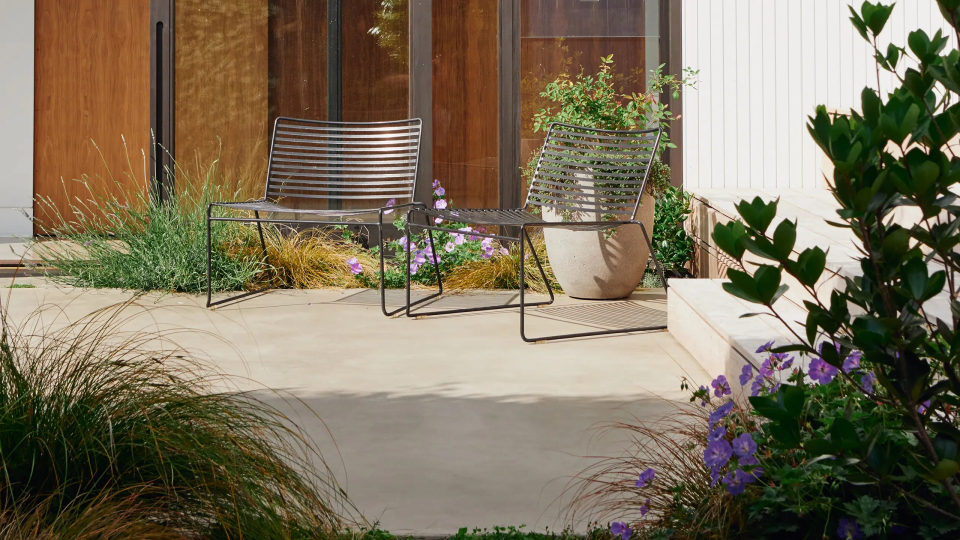
8. Courtyards That Feel Like Retreats
For peaceful escapes or comfortable coffee nooks, courtyards are perfect. Designer finishes from StyleCrete transform small areas into elegant outdoor lounges.
Why It Shines:
- Simple, modern architecture
- Easy to maintain and sweep
- Enhances outdoor décor and plant features
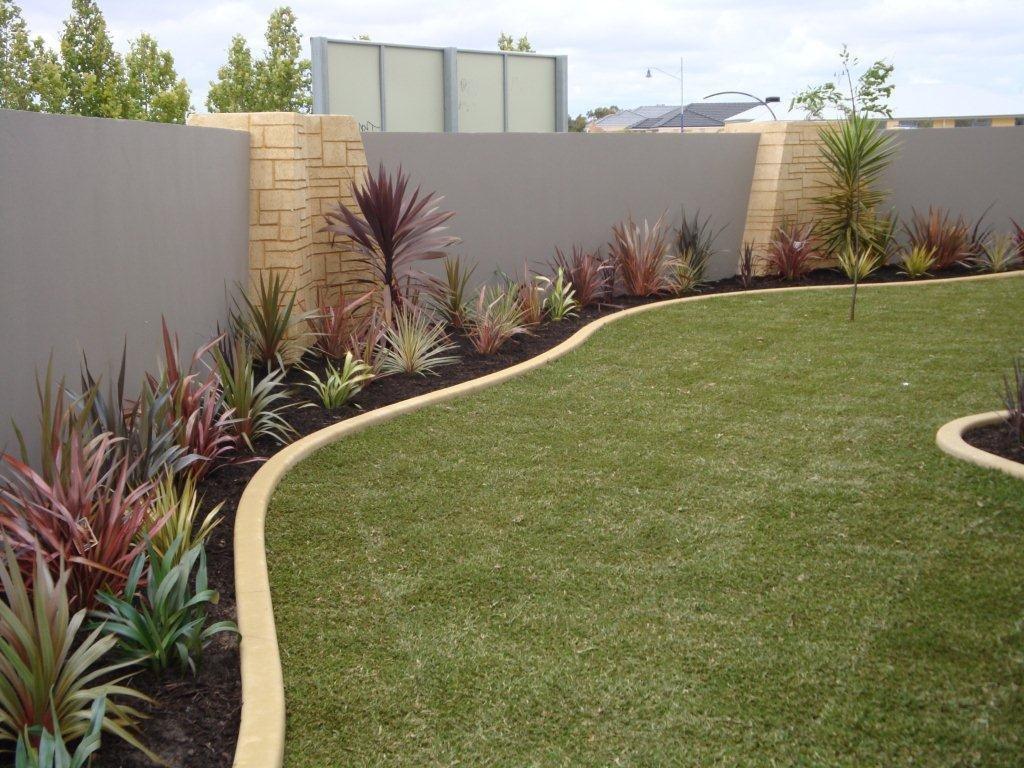
9. Garden Edging and Raised Beds
Create durable and fashionable planters and borders using StyleCrete. Concrete is perfect for long-term landscaping as it won’t decay or destroy like wood does.
Green Thumb Bonus: For a designer landscape, you can match the colour of your outdoor flooring with decorative concrete planters.
10. Outdoor Showers and Utility Zones
Good design is worthy of even the simplest utilitarian spaces. StyleCrete offers easy-to-clean surfaces without sacrificing elegance, making it a wise choice for outdoor showers, bin zones, or garden tool storage areas.
Why It Works:
- Clean and resistant to water
- It gives utility spaces a polished appearance.
- Enhances other tangible components
Conclusion: Let StyleCrete Shape Your Outdoor Vision
Durability is only one aspect of decorative concrete; another is design. Premix Concrete SA’s StyleCrete is reinventing outdoor spaces in Adelaide with style and functionality. StyleCrete may create a striking driveway, a patio that’s ideal for entertaining, or a calm courtyard retreat.
With decorative concrete that blends style, functionality, and dependability created in Australia, you can let your outdoor areas speak for themselves.
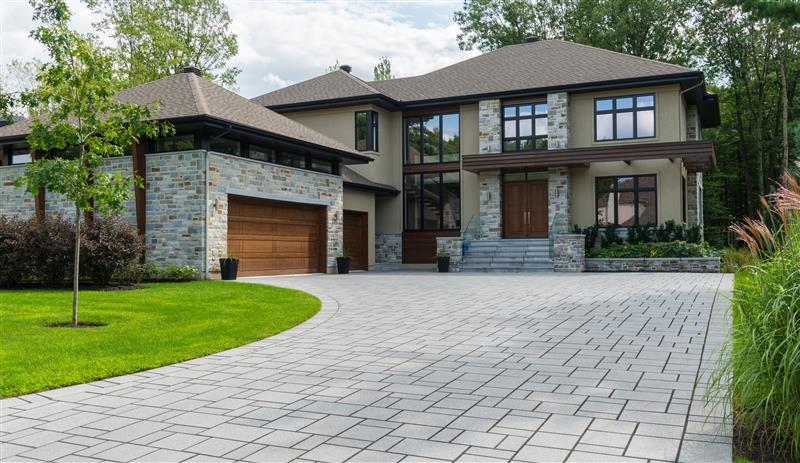
Decorative Concrete vs. Pavers: Which One Should You Choose?
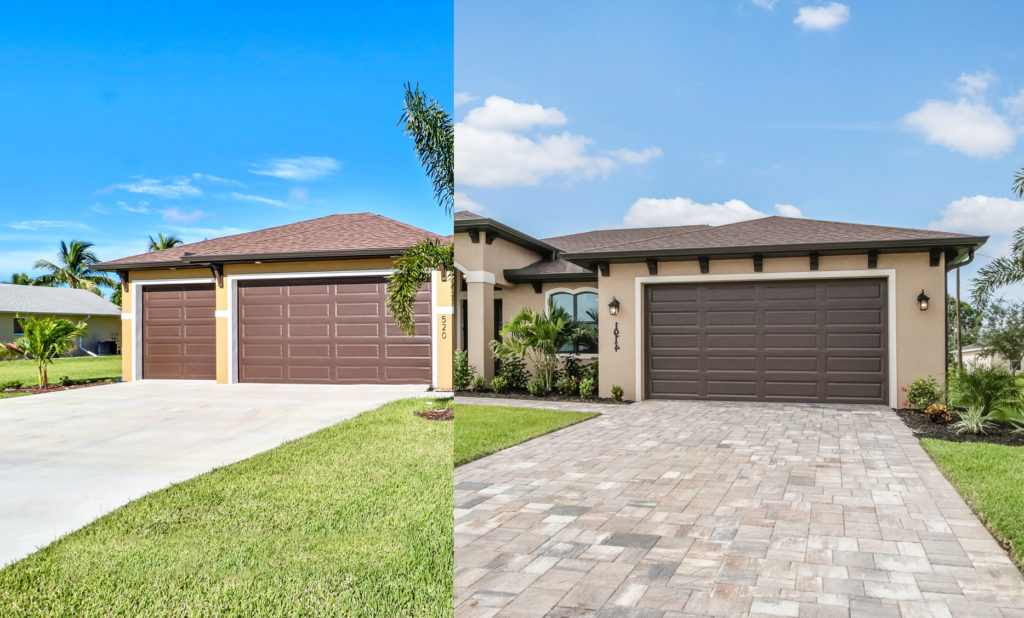
Imagine yourself standing in front of your house, dreaming of a gorgeously textured patio or a modern, simplified driveway. Every feature is enhanced by the sun’s radiance, which covers the surface. But you can’t decide whether to use standard pavers or decorative concrete.
What Is Decorative Concrete?
There is more to decorative concrete than just gray slabs. It’s an artistic solution that includes exposed aggregate concrete, acid staining, polished surfaces, and stamped patterns. These designs offer the affordability and durability of concrete while resembling wood, tile, brick, or even real stone.
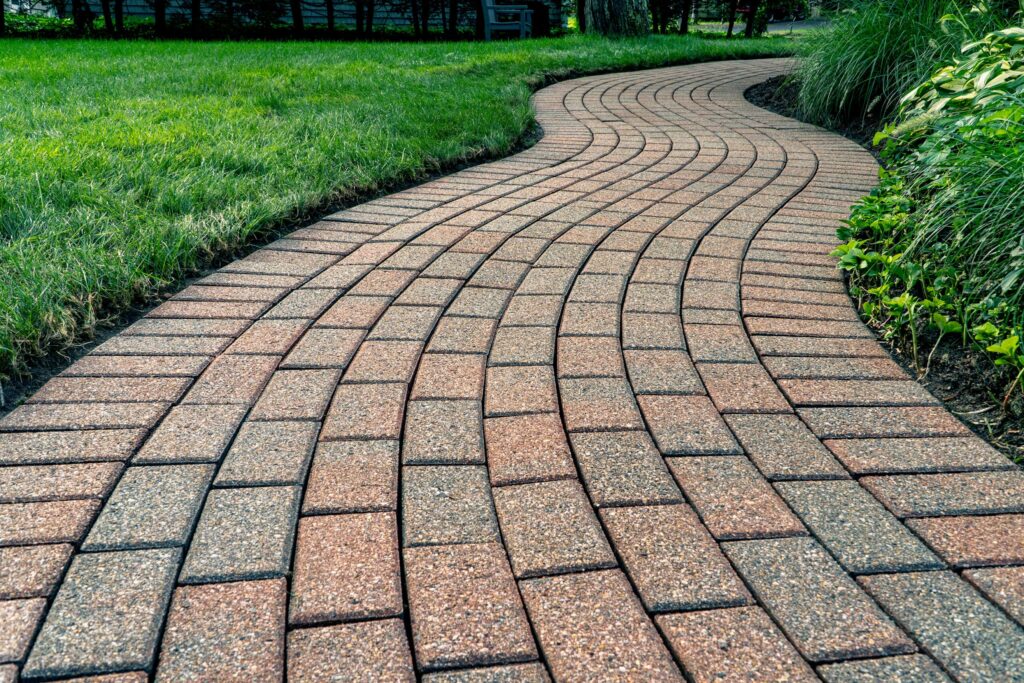
What Are Pavers?
Individual bricks or stones, usually composed of clay, concrete, or natural stone, are arranged in interlocking patterns to form pavers. Pavers are frequently used for patios, walkways, and roads that require a high load-bearing capacity and simple repair because of their strength and modular design.
Let’s go over the differences and assist you in finding the solution that best suits your house, lifestyle, and financial constraints.
1. First Impressions Matter: Aesthetic Appeal
Decorative concrete allows you to create artwork rather than merely placing it on a surface. It allows you to select patterns, colors, and textures that resemble tiles or stones. It has a smooth, contemporary finish. Whether it’s a patio, poolside finish, or ornamental concrete driveway, you’ll love a unique style that’s challenging to duplicate with individual blocks.
Pavers are available in materials like clay, brick, concrete, and stone, offering a classic and enduring look. While they allow for different layouts and pattern combinations, their design versatility is still limited compared to decorative concrete surfaces.
2. Strength & Durability: Built to Last
A concrete surface that has been expertly poured is made to last. Steel fiber reinforced concrete is added to mixes at Premix Concrete SA to increase tensile strength and stop flaking or cracking. In addition to being aesthetically pleasing, exposed aggregate concrete finishes provide improved grip, making them ideal for driveways and pool surrounds. Shifting, dipping, and most definitely weed growth between joints are all prohibited.
Even though the pavers are strong, the earth beneath them may move. This leads to weed attacks, loose joints, and uneven surfaces over time. Although it is beneficial to be able to swap out individual parts, frequent repairs might get challenging.
3. Cost & Installation: What’s the Investment?
Depending on the design complexity, the concrete initial cost may seem a little higher, but the cheap maintenance, longevity, and few future repairs make it worthwhile.
Adding basic pavers is affordable. However, complex designs, specialized materials, or repairs because of damage or movement might raise prices. Although it could be appealing for you to do it yourself, proper alignment and groundwork may not always be as simple as they seem.
4. Maintenance: Love It and Leave It?
Your concrete driveway will continue to look showroom-new with a few gentle pressures washing. There are no sinking patches, loose tiles to realign, or weeds to worry about. With UV-resistant finishes, even the vivid colors of concrete solutions remain true.
Pavers require extra maintenance, including leveling, joint refilling, and weed removal. As time passes, weeds and fugus build up between the pavers, which makes them both slippery and less attractive.
5. Design Flexibility: Your Imagination, Poured
You are not limited to decorative concrete. Even the most creative designs can be achieved with Stylecrete Magic, high-end concrete mixes, and customized concrete solutions. Concrete adheres to your idea, whether you want the look of granite, sandstone, or unique patterns.
On the contrary, pavers are pre-molded. You get what you see.
Final Verdict: Which You Should Choose?
Pavers may be a good option for garden borders or small walkways, but ornamental concrete is the best option for larger areas.
It provides:
- Design flexibility with a range of colored finishes and exposed aggregate options.
- Strength over time with reinforcement from steel fibers
- Fast installation and lower ongoing expenses
- High effect with minimal maintenance
- Home-selling and value-adding style
Whether you’re building a commercial driveway that makes a statement, a family-friendly patio, or an eye-catching entryway, Premix Concrete SA has the expertise, the resources, and the enthusiasm to assist.
We provide more than just concrete in your area. We are your go-to partner for space transformation in South Australia, from Callington to Salisbury.
If, however, your top priorities are:
- Maximum durability and load capacity
- Simple modular fixes
- A lot of pattern variation and visual contrast,
Then pavers can be the most suitable choice.
Conclusion
Decorative concrete and pavers are both great options; which one you choose will depend on your preferences. There is no faulty choice – just what is best for your house, whether it is the dependable rigidity of pavers or the fashionable flare of decorated concrete. Looking to transform your outdoor area? With more than 30 years of industry experience and multiple stores throughout Australia, Premix Concrete SA is your go-to partner for transforming ideas into stunning spaces using their exclusive Stylecrete collection and top-tier concrete expertise.
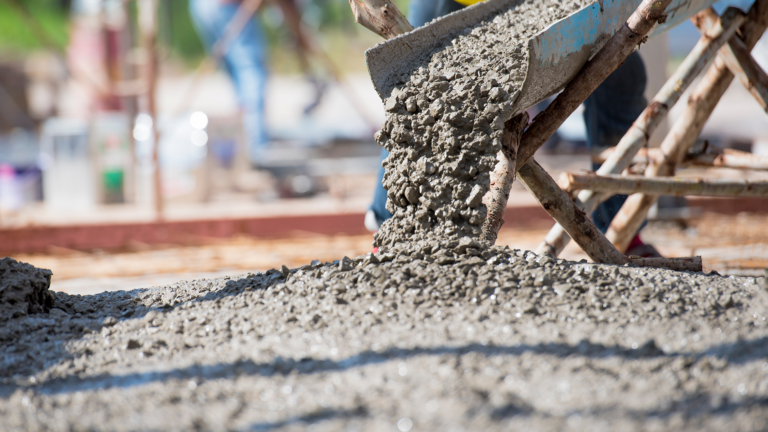
What is MPa in Concrete?
Concrete is everywhere — from your driveway and footpaths to large-scale commercial buildings. But if you’ve ever reviewed a concrete specification or spoken to a supplier, you’ve probably come across the term MPa. So, what does it mean? And why is it important for your next project?
A Complete Guide for Homeowners & Builders
Understanding MPa – Megapascals in Concrete Strength
MPa stands for megapascal, a metric unit used to measure compressive strength. In the context of concrete, it tells you how much pressure the concrete can handle before it cracks or fails.
To put it in perspective:
1 MPa = 1 million pascals
The higher the MPa, the stronger the concrete
If a concrete mix is rated at 20 MPa, it can withstand 20 million pascals of pressure before breaking. Pretty impressive, right?
Why Does Concrete Strength Matter?
The strength of concrete directly influences its performance, durability, and suitability for different applications. Choosing the wrong MPa can lead to structural issues, premature cracking, and unnecessary costs.
1. Resistance to Cracking
Concrete with a higher MPa is less likely to crack under pressure, thermal expansion, or shrinkage. For example:
20 MPa concrete is sufficient for footpaths or driveways with light loads.
32 MPa or higher is needed where there’s frequent vehicle traffic or heavy machinery.
2. Longevity in Harsh Conditions
High-MPa concrete resists damage from:
Freeze-thaw cycles
Heavy rainfall or flooding
Salt exposure in coastal regions
This makes it ideal for outdoor, industrial, or marine environments.
3. Better Water and Chemical Resistance
Concrete with a higher MPa has a denser mix, reducing porosity. This means:
Less water can seep in
Lower risk of corrosion to steel reinforcements
Increased resistance to aggressive chemicals (especially in industrial applications)
4. Structural Integrity Over Time
In long-term structures like bridges, high-rise buildings, and commercial slabs, a stronger concrete mix (40 MPa+) ensures the structure remains safe and stable for decades.
In Short:
Low MPa = suitable for basic use, but limited durability
High MPa = increased strength, durability, and lifespan
For any project that demands long-lasting performance, selecting the right MPa is crucial.
How to Choose the Right MPa for Your Project
It all comes down to the function of the concrete:
Residential Use? A standard 20 MPa concrete mix is typically enough for light structures and general domestic use.
Commercial Applications? You may need a ready mix concrete, especially in areas exposed to vehicles or machinery.
Aesthetic Finishes? If you’re going for an exposed aggregate concrete finish, the strength still matters—it needs to hold up while showcasing the natural stone textures on the surface.
The Role of Premix Concrete SA
Premix Concrete SA handles on-site finishing and specializes in designing and delivering high-performance concrete mixes that meet Australian Standards.
Here’s how we work:
All mixes are designed based on your application needs.
Only premium materials are used to ensure long-term durability.
Advanced batching ensures consistent quality in every load.
We offer Normal Class Concrete, which includes:
20 MPa and 25 MPa mixes for homes and footpaths
32 MPa, 40 MPa, and 50 MPa for commercial and industrial work
So, when you choose Premix Concrete SA, you’re getting precision-designed mixes that match your project, every time.
What Else Affects Concrete Strength?
While MPa is a major factor, here are other elements that influence concrete performance:
Water-Cement Ratio: Less water usually means higher strength
Curing Time: Concrete continues to gain strength as it cures
Mix Quality: Using trusted readymix concrete suppliers in Adelaide ensures consistency and quality control
Final Thoughts
MPa might seem like just another number, but it’s a key part of getting your concrete job right. Whether you’re building a shed, pouring a driveway, or working on a large-scale commercial project, knowing what MPa rating you need helps prevent future headaches.
Remember: it’s not just about how the concrete looks — it’s about how well it holds up under pressure.
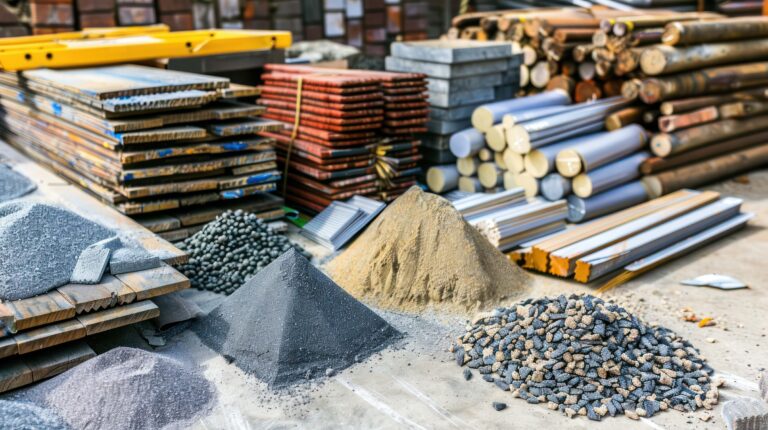
Exploring Different Types of Concrete Mix and Their Benefits
Concrete is one of the world’s most widely used building materials, known for its durability, strength, and versatility. However, not all concrete is the same—various mixes are designed to meet specific structural and aesthetic requirements. From standard mixes for everyday construction to specialized blends for decorative purposes, understanding the different types of concrete can help you choose the right one for your project.
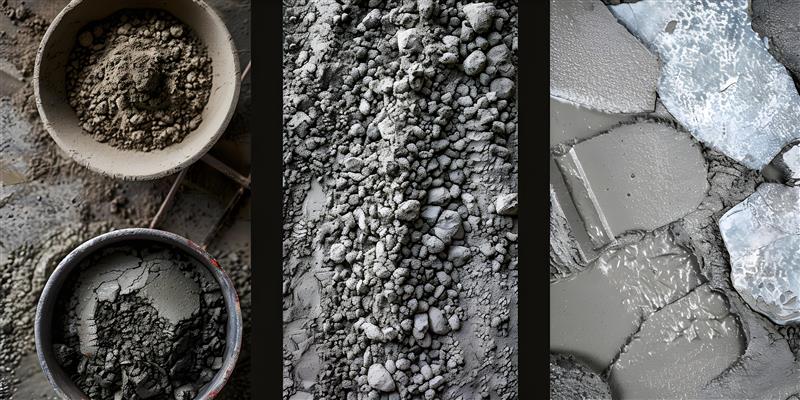
Different Types of Concrete Mix
1. Plain Concrete (Normal Strength Concrete)
Overview:
Plain concrete, known as regular strength concrete, is the most straightforward and commonly used mix. It consists of cement, sand, and aggregate in a standard ratio 1:2:4, mixed with water. This type of concrete is widely used for basic construction applications where high tensile strength isn’t a critical requirement.
Uses:
- Pavements and walkways
- Flooring for residential and commercial buildings
- Simple foundations and non-load-bearing structures
Benefits:
Easy to mix and apply
Cost-effective for large-scale projects
Suitable for applications that don’t require reinforcement
2. Reinforced Concrete (RC)
Overview:
Reinforced concrete is an enhanced version of plain concrete that includes steel bars, mesh, or fibers to improve its tensile strength and load-bearing capacity. This makes it a popular choice for structures requiring extra durability and resilience.
Uses:
- Bridges, tunnels, and overpasses
- High-rise buildings and structural foundations
- Beams, columns, and slabs in construction
Benefits:
Greater tensile strength and crack resistance
Long-lasting and highly durable
Can withstand heavy loads and harsh weather conditions
3. Decorative Concrete – Stylecrete by Premix Concrete
Overview:
Unlike traditional concrete used for structural purposes, decorative concrete focuses on aesthetics and functionality. It can be enhanced using different textures, colors, finishes, and patterns to create visually appealing surfaces.
Premix Concrete supplies over 40 different mixes of Stylecrete, all manufactured to Australian standards and available in various finishes to suit different architectural styles.
Types of Decorative Concrete:
- Stamped Concrete: Mimics the look of brick, stone, or wood through textured patterns.
- Colored Concrete: Pigments or dyes are added to achieve various colors.
- Polished Concrete: A smooth, high-gloss finish achieved through mechanical grinding and polishing.
- Colored exposed aggregate concrete: A popular decorative style where the top layer is removed to reveal stones, quartz, or gravel beneath, giving a unique textured appearance.
Uses:
- Driveways, patios, and walkways
- Interior flooring with a modern aesthetic
- Pool decks and outdoor landscaping
Benefits:
Enhances the visual appeal of structures
Low maintenance compared to traditional flooring
It can be customized for unique design preferences
Supplied by Premix Stylecrete Concrete, ensuring top-quality materials and expert
Craftsmanship
4. High-Strength Concrete (HSC)
Overview:
High-strength concrete is designed for projects that demand extra compressive strength. It is created using a lower water-to-cement ratio and often includes silica fume or fly ash to enhance its durability.
Uses:
- Skyscrapers and commercial buildings
- Bridge construction and heavy infrastructure
- Industrial floors are exposed to extreme loads.
Benefits:
Exceptional strength and load-bearing capacity
Increased resistance to environmental factors
Longer lifespan than standard concrete
5. Lightweight Concrete
Overview:
Lightweight concrete incorporates lightweight aggregates like pumice, expanded clay, or perlite, reducing the structure’s overall weight while maintaining strength.
Uses:
- Roofing and insulation
- Bridge decks and precast wall panels
- Decorative elements in architecture
Benefits:
Reduces structural load
Improves thermal and sound insulation
Easier to transport and handle on-site
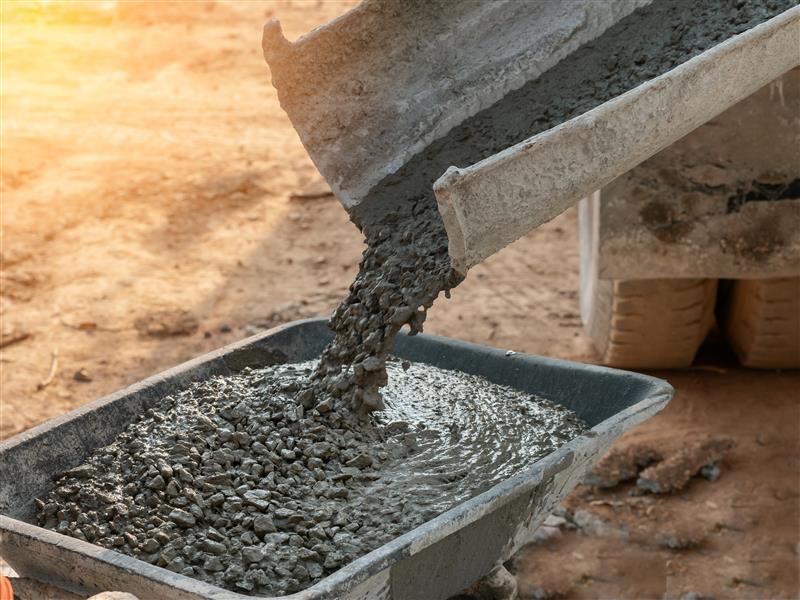
6. Ready-Mix Concrete (RMC)
Overview:
Ready-mix concrete is pre-mixed at a batching plant and transported to construction sites in transit mixers. It eliminates the need for on-site mixing, ensuring consistency and efficiency.
Uses:
- Large-scale construction projects
- Residential and commercial building foundations
- Infrastructure projects with strict quality control
Benefits:
Time-saving and efficient
Ensures consistent quality and strength
Reduces material wastage
7. Precast Concrete
Overview:
Precast concrete elements are manufactured in a controlled environment before being transported and assembled on-site. This method allows for faster construction and improved quality control.
Uses:
- Beams, columns, and panels
- Precast staircases and boundary walls
- Bridges and drainage systems
Benefits:
Faster installation and reduced labor costs
Higher precision and uniformity
Enhanced durability and weather resistance
8. Self-Consolidating Concrete (SCC)
Overview:
Self-consolidating concrete is a highly flowable mix that spreads into place without requiring mechanical vibration. It is ideal for complex formwork and densely reinforced structures.
Uses:
- Architectural structures with intricate designs
- Densely reinforced columns and walls
- Precast concrete elements
Benefits:
Reduces labor costs and work time
Provides a smooth, high-quality finish
Minimizes the risk of voids or honeycombing
10. Polymer Concrete
Overview:
Polymer concrete replaces traditional cement with polymer resin, creating a highly durable and chemical-resistant material.
Uses:
- Industrial flooring and drainage systems
- Repairing and resurfacing damaged concrete
- Applications requiring high resistance to chemicals
Benefits:
Exceptional strength and bonding capabilities
Resistant to water and harsh chemicals
Rapid curing and reduced maintenance requirements
Why Choose Premix Concrete?
Regarding high-quality concrete solutions, Premix Concrete stands out as a leading ready-mix concrete supplier in Adelaide. Their concrete range allows architects, designers, and homeowners to create stunning, long-lasting surfaces beyond standard concrete applications.
What Makes Premix Concrete the Best?
- One of the premier suppliers of decorative concrete is Premix Concrete, whose Stylecrete range offers an extensive selection of colored, polished, exposed, and seeded mixed concrete. Their decorative concrete solutions are designed to bring elegance and sophistication to floors, paths, and driveways.
- All mixes meet Australian standards, ensuring high quality and durability.
- Aesthetic and functional solutions for driveways, patios, walkways, and floors
Whether looking for a reliable structural mix or a decorative solution to enhance your space, Premix Concrete delivers high-performance, beautiful, and durable concrete options tailored to your needs.
Conclusion
Choosing the correct type of concrete mix is essential for ensuring your project’s durability, strength, and aesthetic appeal. Plain concrete is ideal for simple, cost-effective applications, while decorative concrete enhances the visual appeal of spaces. Meanwhile, high-strength, lightweight, and self-consolidating concrete provides specialized solutions for structural and architectural needs.
By understanding the benefits and applications of each type, you can select the most suitable concrete mix to meet your construction goals, ensuring a long-lasting and high-quality result.
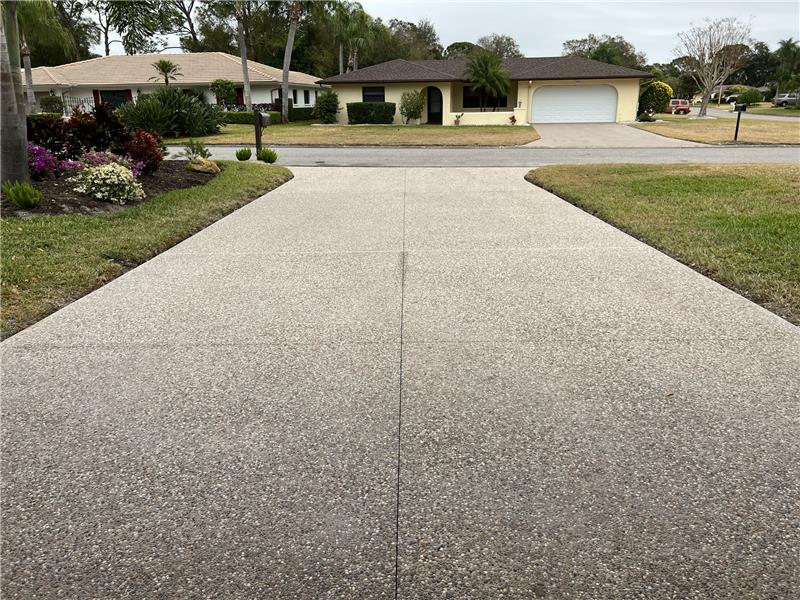
How to Choose the Exposed Aggregate Colour
Choosing the right ready mix concrete for your home or project is exciting. It balances style, functionality, and durability to create a beautiful and practical space. It can transform a decorative concrete driveway, patio, or walkway. Here’s how you can confidently select the best colour for your concrete.
Match It to Your Environment
The first thing to consider is how the colour will blend with its surroundings. Take note of:
- House Exterior: Look at your home’s paint, roof, and brick tones. Neutral greys or beiges work well for modern homes, while earthy tones like browns and tans suit traditional or rustic designs.
- Landscaping: If you have a garden, pool, or decorative elements, choose a complementary colour. Greens and browns pair beautifully with natural outdoor spaces.
- Neighbourhood Aesthetic: It’s wise to align with the general look of your area, especially if there are guidelines in place. If you live in Adelaide, many homeowners prefer concrete decorative driveways in Adelaide for their stylish appeal and lasting quality.
Think About Maintenance and Practicality
Test with Samples
Concrete colours can look different depending on lighting and texture. Many suppliers provide samples or small slabs. Place these in the area you plan to pave and check how they look at different times of the day. Sunlight, shade, and artificial lighting can all influence the appearance.
Budget Considerations
The Exposed Aggregate Colour comes in various styles and materials, and the choice can affect the cost. Natural stone aggregates like quartz, granite, or river pebbles offer a luxurious look but may be pricier. On the other hand, coloured oxides mixed into the concrete provide an affordable yet elegant option.
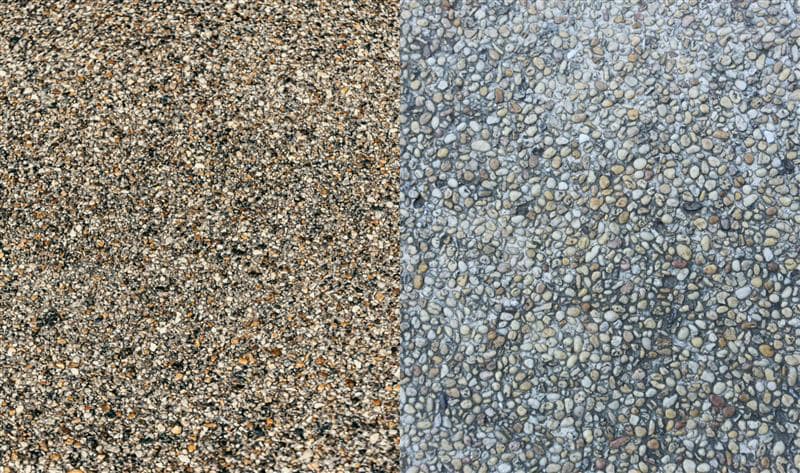
Top Exposed Aggregate Colour Combinations for Different Styles
Here are some popular and timeless colour pairings:
- Warm Beige with Charcoal Highlights: This mix offers a welcoming yet modern look. It works well for driveways and outdoor entertainment areas.
- Light Grey with Navy Accents: For a sleek and bold style, this combination adds a contemporary edge. Ideal for pathways and patios.
- Terracotta Red with Cream Tones: If you prefer a vibrant and rustic look, this pairing creates a Mediterranean-inspired charm, perfect for garden spaces.
- Black and White Aggregate: Striking and stylish, this combination suits modern and minimalist designs.
- Brown Aggregate: An earthy choice that blends seamlessly with gardens and natural landscapes.
- Charcoal Aggregate: It is best for contemporary designs and creates a luxurious, polished look
Best Colours for Specific Areas
- Outdoor Areas: Earth tones like sandy beige, taupe, or light grey are great choices. They reduce heat absorption and maintain a comfortable surface temperature.
- Driveways: Neutral shades like white, beige, and grey enhance curb appeal while making your driveway look spacious and elegant.
- Kitchens and Bathrooms: For indoor concrete floors, grey, red, and white add character. Darker shades work well in large spaces, while lighter colours make small rooms feel brighter.
Factors to Consider:How to Choose the Exposed Aggregate Colour for Your Project
Selecting the right colour for your aggregate concrete involves more than just aesthetics. Environmental factors, aggregate type, size, and textures all affect how the final result looks and performs. Here’s what to keep in mind:
Managing Heat Absorption
In outdoor areas, colour choice can directly affect surface temperature. Darker shades absorb more heat, making them less ideal for spaces like poolside areas or patios in sunny regions. On the other hand, lighter colours reflect heat and stay cooler underfoot, providing a more comfortable experience.
Enhancing Visibility and Safety
Good visibility is essential, especially for pathways, driveways, or areas with limited lighting. Lighter colours improve visibility in dimly lit spaces, while darker shades work well in well-lit environments. If safety is a concern, adding textures with exposed aggregates can increase slip resistance, providing additional security.
Considering Aggregate Type and Size
The type and size of the aggregate used in your concrete can significantly impact the appearance and texture. Larger aggregates create a bold, striking finish, often popping the colour. Smaller aggregates, on the other hand, offer a smoother and more uniform look. Natural stones like quartz, granite, or river pebbles add character and colour variation, making your concrete stand out.
- Fine Aggregates: Ideal for a subtle, sleek look.
- Medium to Large Aggregates: Best for adding texture and visual interest.
- Mixed Aggregates: Create a dynamic, multi-dimensional effect.
Understanding Texture and Finish
The texture is determined by the mix of materials and the finishing technique. Rougher textures offer a more natural appearance and increase slip resistance, making them ideal for pool surrounds or driveways. On the other hand, polished or sealed finishes can enhance colour vibrancy and create a more refined, elegant look.
- Brushed or Washed Finish: Provides a textured, non-slip surface.
- Polished Finish: This creates a glossy, luxurious effect.
- Sealed Finish: Enhances the depth of colour and offers added protection.
Testing in Different Lighting
Colours can appear drastically different depending on the lighting conditions. Sunlight may brighten colours, while shadows and artificial lighting can change their tone. It’s a good idea to view samples in various situations — morning, midday, and evening — to ensure the colour compliments your space throughout the day.
Personalising Your Colour Choice
Choosing a colour is a personal decision, and it’s always good to consider your existing décor, landscape, and lighting. If unsure, try sampling a few colour combinations and observe their appearance in different lighting conditions.
Premix Group of Companies is one of Australia’s most reliable concrete suppliers, offering a wide range of exposed aggregate concrete options. With years of expertise, they’ll help you choose the perfect colour to suit your project and budget.
Choosing the right colour is all about creating a space you’ll love for years. Take your time, gather samples, and consult the experts — your perfect aggregate colour is just around the corner!
Common Customer Questions About Exposed Aggregate Concrete
1. How Do You Clean and Seal Exposed Aggregate Concrete?
Cleaning and sealing is essential to maintaining its durability and aesthetic appeal. Over time, dirt, grime, and stains can accumulate, making the surface look dull.
Cleaning Process:
- Start by sweeping away loose debris and dirt using a broom or leaf blower.
- Use a garden hose or pressure washer to remove surface dust and grime. If using a pressure washer, keep the nozzle at a safe distance to avoid damaging the concrete.
- For stubborn stains, apply a mild detergent or a specialized concrete cleaner and scrub the area with a stiff brush. Avoid harsh chemicals like acid-based cleaners, as they can erode the concrete.
- Rinse thoroughly and let the surface dry completely before sealing.
Sealing Process:
- Choose a high-quality concrete sealer suitable for exposed aggregate surfaces. Penetrating or film-forming sealers are commonly used.
- Apply the sealer with a roller or sprayer, ensuring an even coat over the entire surface.
- Allow the first coat to dry as per the manufacturer’s instructions before applying a second coat if needed.
- Keep the area free from foot traffic and moisture for at least 24 to 48 hours to ensure proper curing.
Regular sealing every two to three years helps protect against moisture, stains, and surface wear, keeping the concrete looking fresh and enhancing its longevity.
2. How Does a Snowblower Perform on Exposed Aggregate Concrete?
Using a snowblower on the concrete requires caution. The textured surface can make snow removal slightly more challenging than smooth concrete, but with the right approach, it can be done effectively.
Performance Considerations:
- Single-stage snow blowers are not ideal, as their rubber paddles can catch on the exposed stones, leading to wear and potential damage.
- Two-stage or three-stage snow blowers are better suited because they have augers that do not make direct contact with the surface.
- To prevent damage, adjust the height of the auger or skid shoes so that the metal parts do not scrape against the aggregate.
- Using plastic or rubber paddles instead of metal blades can help minimize wear and tear.
To avoid excessive wear, consider using alternative snow removal methods such as a plastic snow shovel or a snow melt solution that is safe for concrete surfaces.
3. Can You Put Exposed Aggregate Over Existing Exposed Aggregate Concrete Walls?
It is possible to apply a new layer of aggregate concrete over an existing surface, but it requires proper preparation and the right bonding techniques.
Process for Applying Exposed Aggregate Over Existing Walls:
- Surface Preparation: The old concrete surface must be thoroughly cleaned to remove dirt, oil, or loose debris. A pressure washer or concrete cleaner is recommended.
- Applying a Bonding Agent: A bonding primer or adhesive must be applied to help the new concrete adhere to the existing surface. Without this step, the new layer may not properly bond and could crack over time.
- Adding the New Concrete Layer: A fresh layer of concrete is poured over the existing surface, followed by embedding aggregates into the top layer before it sets.
- Finishing and Curing: After exposing the aggregate using a surface retardant or washing technique, the new layer needs proper curing for durability.
While it is possible to overlay, it is always best to consult a professional to ensure structural integrity and avoid potential cracking or delamination.
4. Is Exposed Aggregate Cheaper Than Stamped Concrete?
The cost of exposed aggregate concrete versus stamped concrete depends on factors like materials, labor, and the complexity of the design.
Cost Comparison:
- Material Costs: It typically requires high-quality aggregates, while stamped concrete involves colored pigments and stamping tools, making material costs relatively similar.
- Labor Costs: Stamped concrete often requires more intensive labor, as it involves stamping patterns and applying color techniques.It requires less intricate finishing but still involves skill in washing and revealing the aggregates.
- Longevity and Maintenance: Exposed aggregate is highly durable and requires minimal maintenance, whereas stamped concrete may need periodic re-coloring or resealing to maintain its appearance.
Overall, exposed aggregate concrete is often slightly more affordable than stamped concrete, particularly for large-scale projects like driveways and patios. However, pricing can vary based on design preferences and installation complexity.
5. What Are Some Alternatives to Concrete Sealers for Exposed Aggregate Driveways and Walkways?
If you prefer to avoid traditional concrete sealers, there are several alternative options that can help protect exposed aggregate concrete from wear and weather exposure.
Alternative Sealing Methods:
- Silicate-Based Densifiers: These penetrate deep into the concrete, strengthening the surface and reducing moisture absorption without creating a glossy finish.
- Natural Oil Treatments: Linseed oil or tung oil can provide mild protection, but they require frequent reapplication and may darken the surface over time.
- Beeswax or Polyurethane Coatings: While these are not common, they can offer some level of water resistance, though they may alter the natural appearance of the aggregate.
- Penetrating Water Repellents: These are designed to reduce water absorption without forming a film on the surface, making them an excellent choice for maintaining the natural look of exposed aggregate.
Traditional sealers remain the most effective way to protect exposed aggregate driveways and walkways, but these alternatives can be used in cases where a different finish is preferred.
6. How Long Does an Exposed Aggregate Finish on Concrete Last Before It Needs to Be Sealed?
The lifespan of an aggregate concrete finish depends on factors such as weather conditions, usage, and maintenance practices.
Typical Timeframe for Resealing:
- In moderate climates with minimal wear, a sealer can last two to three years before reapplication is needed.
- In high-traffic areas or regions with harsh weather, sealing may be required every one to two years to maintain protection.
- If the surface becomes dull, absorbs water quickly, or shows signs of cracking, it is a clear indication that resealing is necessary.
Factors That Affect Sealer Longevity:
- Sun Exposure: UV rays can break down sealers over time, causing them to lose effectiveness.
- Foot and Vehicle Traffic: High usage areas will wear out faster and require more frequent sealing.
- Cleaning Practices: Harsh chemicals and power washing can strip sealers prematurely, requiring earlier reapplication.
To extend the lifespan of exposed aggregate concrete, regular maintenance, proper sealing intervals, and avoiding abrasive cleaning methods are recommended.
Conclusion
Understanding the proper care, costs, and alternatives for exposed aggregate concrete ensures its long-lasting durability and visual appeal. From cleaning and sealing to selecting the right installation techniques, taking the right steps can enhance its performance for years to come. Whether using a snowblower safely, choosing an alternative to sealers, or considering an overlay, professional guidance is always recommended to achieve the best results
How to Resurface Overexposed Aggregate Concrete

Concrete surfaces with exposed aggregate are firm and look good. But over time, it can lose its shine because of weather and ageing. Simply resurfacing over exposed aggregate concrete can make it look original and compelling without spending a lot of money. This guide by Ready mix Concrete suppliers in Australia will explain step-by-step instructions for resurfacing over exposed aggregate concrete and making sure that you get professional-quality results.
Why Resurfacing Over Exposed Aggregate Concrete Is Essential
Exposed aggregate concrete is usually known for its unique texture and visual appeal and is often used for driveways, patios, and walkways. Gradually, elements like heavy traffic, sun exposure, and moisture can cause it to crack, cracks, discolouration, and surface erosion. Resurfacing helps:
Restore the original worth of your concrete surface.
Improve durability and protect it from future damage.
Save money compared to complete concrete replacement.
Tools and Materials Needed to Resurface Exposed Aggregate Concrete
Before beginning the project, collect these essential tools and materials:
Pressure washer
Concrete resurfacer
Bonding agent
Trowel or squeegee
Protective gear (gloves, goggles, mask)
Edging tool
Decorative concrete sealer (optional)
Step 1: Check the Condition of the Concrete
The first step in resurfacing over exposed aggregate concrete is considering the surface’s condition. Look for:
Cracks, chips, and holes
Discoloration or stains
Signs of structural damage
If the surface is badly damaged or unstable, and if you want expert advice on whether resurfacing is the best solution or replacement is necessary, directly consult with concrete suppliers.
Step 2: Clean the Surface Thoroughly
A clean surface is required for a successful resurfacing project. Use a pressure washer to remove dirt, grease, and loose debris. For tough stains, you can use a degreaser or concrete cleaner. Before moving to the next step, always make sure the surface is dry.
Step 3: Repair Cracks and Imperfections
Permanently repair any visible cracks or holes before applying the resurfacing material. Use a concrete repair mix and a trowel to fill these imperfections. After applying the repair mix, smooth the surface and allow the repairs to cure as instructed by the product manufacturer.
Step 4: Apply a Bonding Agent
Applying a bonding agent helps the resurfacer adhere appropriately to the existing surface. Follow the product instructions to spread the agent across the concrete evenly. This step is essential in ensuring a long-lasting finish.
Step 5: Mix the Concrete Resurfacer
By following the manufacturer’s guidelines, mix the resurfacing material. Use a bucket and a drill with a mixing paddle to ensure a smooth, lump-free mixture. To avoid the mixture setting, work in small batches before you apply it.
Step 6: Apply the Resurfacer
Finally, you can apply the concrete resurfacer. Follow these steps:
Start at one corner of the surface.
Pour the mixture and spread it evenly using a squeegee or trowel.
Keep the thickness, usually around ¼ inch.
Use an edging tool to create clean lines along borders.
Work fast and carefully to stop the resurfacer from drying unevenly.
Step 7: Add Decorative Finishes (Optional)
Consider using decorative elements to make your resurfaced concrete more attractive.
Coloured concrete company experts recommend:
Adding coloured aggregates or pigments for a custom look.
Stamping patterns to mimic stone or tile designs.
Step 8: Allow the Surface to Cure
Proper curing is necessary to ensure durability. Keep the surface safe from foot traffic, rain, and direct sunlight for at least 24-48 hours, depending on the resurfacer’s drying time. Follow the product instructions for exact curing details.
Step 9: Seal the Surface
To improve durability and prevent stains, a concrete sealer adds a protective coating. Choose a sealer designed for decorative concrete driveways or exposed aggregate surfaces. Apply it evenly with a roller or sprayer, and let it dry completely before use.
Tips for Maintaining Your Resurfaced Concrete
To maintain your resurfaced concrete in perfect condition:
- Wash it regularly with mild detergent and water.
- To protect it, reapply the sealer every 2-3 years.
- Avoid using harsh chemicals or metal shovels that may damage the surface.
External Resources:
- Concrete Network – For tips on decorative concrete options and techniques.
- Decorative Concrete Driveways – Explore design ideas and maintenance tips for driveways.
Conclusion
Understanding how to resurface over exposed aggregate concrete can save time and money while fixing the beauty and functionality of your surfaces. With proper preparation and correct materials, you can get long-lasting professional results, and this guide provides everything you need to succeed.
For high-quality materials and expert tips, reach out to reputed local concrete suppliers. To explore more creative options in creative designs, connect with a trusted colored concrete company. Resurfacing not only refreshes your space—it adds value and appeal to your property.